Why purchase yet another heart-shaped box of mystery chocolates that inevitably ends up half eaten? Give your family the Valentine’s Day gift they really want- a magnet featuring their very favorite person!
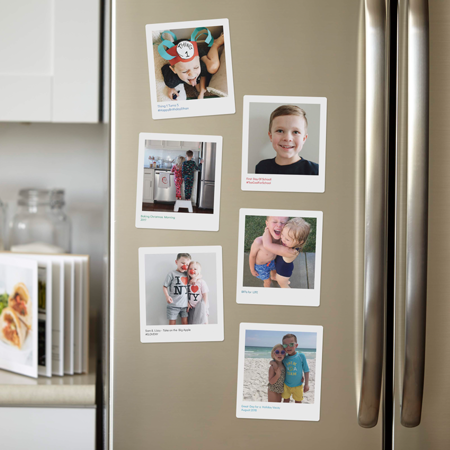
Pinhole Press has this amazing 6 or 12-pack of polaroid magnets that are fully customizable. That means you can add your own photos and notes for each magnet. Use the same photo on all of ‘em, or switch it up. Make them all for one person, or create individual ones for every family member. The choice is yours!
Once you’ve ordered your set, create this camera valentine as a cute envelope for your magnet. Your family and friends are sure to love it!
You will need:
Colored cardstock


Glitter cardstock

Ruler

Scissors

X-ACTO knife

Glue gun

Circle punch

Heart punch

Paper cutter (optional but will make it easier!)
- First, we need to create our card. Cut a rectangle that is 7.5 inches x 4.5 inches.
2. Mark 3.5 inches from one side and score the card. Then mark at .5 inches from the other side and score the card. Fold along the score marks. (Hint: If you don’t have a paper cutter/scorer, you can just fold the paper at these measurements
3. Place your magnet against the section between the 2 folds and mark where you’ll need to cut your opening.
4. Using your ruler, cut along your markings with your X-ACTO knife. I recommend putting some cardboard underneath to protect your tabletop. Plus, it helps you create straight lines if you put your card and ruler against the edges to keep it straight.
5. Once you have one card made (and you’re sure the magnet fits!), use it as a template to create the rest of your cards for the other 5 magnets. This will save you lots of time.
6. Now you’re ready to create the front of your camera! Use paper punches to create a 2 inch circle, a 2.5 inch circle, and a heart. Use your scissors to cut a rounded rectangle for the flash.
7. Glue all your camera pieces onto the front of the valentine.
8. Place your magnet inside, then seal the edges with your glue gun- make sure you don’t get any glue on the magnet itself. Be sure to tell your family there’s a magnet inside so they can open it and put in on their fridge!
Once you’ve created your template, these valentines only take about 10-15 minutes each to make. I timed it, including a few dance breaks. My favorite way to craft is while watching a movie, so pop on a rom-com and bust out your glue gun- we have some crafting to do!
And, don’t forget to order your photo magnets now so you can get them in time for Valentine’s Day!

About the Author: Catherine Cardona
I’m from NYC, but I recently bought a house and moved out to Long Island with my husband and our 3 cats. During the week I’m an office manager, but on the weekends I’m a crafter, blogger, and party stylist. I love anything pink, cupcakes, and Disney!
